Step 1: Moisturizer
Before starting any makeup routine, make sure that you have given your face a good cleanse using a quality cleanser. Now you can begin the first step in your new makeup routine, starting with a good moisturizer. Using your finger tips, apply a dime-sized amount to hydrate your skin, lightly rubbing it in using circular motions until it’s all absorbed. I would suggest a lightweight, non-greasy formula to keep your skin refreshed all day. Popular options include Cetaphil Daily Hydrating Lotion or Neutrogena Hydro Boost Gel.
Step 2: Primer
Next, use a primer to create a smooth canvas for applying your makeup. Again, use your fingertips and blend the product all over your face. A silicone-based primer can fill in pores and fine lines. Try the Smashbox Photo Finish Primer for a flawless feel.
Step 3: Foundation
Choose a foundation that matches your skin tone and undertone. Apply the foundation in a stippling motion, gently tapping it into your skin. Those who are new to makeup may want to consider a liquid foundation for buildable coverage. Use a damp beauty sponge for an even application; Revlon ColorStay Foundation is a great option.
Step 4: Concealer
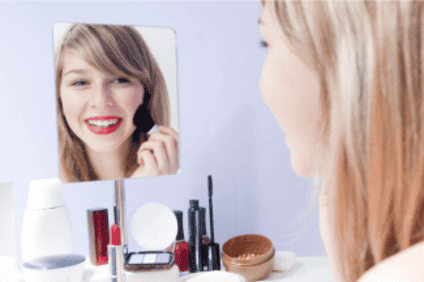
Dot concealer under your eyes and on blemishes. Blend it with your finger, brush, or sponge, and once again use a stippling motion, gently tapping it into your skin. A great beginner product is Maybelline Instant Age Rewind Concealer, which provides excellent coverage.
Step 5: Contour
Contouring is the technique of sculpting and adding dimension to your face. It all comes down to simulating the way light and shadow define your face. Lightly contour your cheekbones, jawline, and forehead to add dimension. Use a cream contour for a subtler effect. Milk Makeup Sculpter Contour Stick is easy for beginners to handle.
Step 6: Powder
Now it is time to apply powder. This is used to set the previous steps and your foundation; use a translucent powder to control shine. Apply the powder using a fluffy brush. A good place to start would be with Laura Mercier Translucent Loose Setting Powder.
Step 7: Blush
Applying blush is an important step, and there are several different techniques depending on your face shape and what you are trying to achieve. Applying the blush high on the cheeks and blending it into the temples is arguably the most common technique. This method lengthens your face and raises your cheeks. This style, in my opinion, works well on all face shapes, but it looks particularly nice on oval or round faces. A cream blush, like Glossier Cloud Paint, is a good starting point as it is easy to blend.
Step 8: Highlighter
Apply highlighter to your skin using your fingers or a brush; begin with your cheeks and brow. Gently rub with a brush or tap with your fingertips to get a soft-focus finish. Once you have done this, use your finger or brush to gently apply any leftover product to your cupid’s bow, the corners of your eyes, and the bridge of your nose. Once complete, you should have a diffused glow, not harsh, stripe-like lines. L’Oreal Paris Makeup True Match Lumi Glotion is a beginner favorite.
Step 9: Eyeshadow
Before applying any eyeshadow, use a good-quality eyeshadow primer or concealer to create a smooth base; this will help the eyeshadow last longer. To start with, you only need to choose 2-3 shades: one light (for highlighting), one medium (for the lid), and one dark (for defining).
Start by applying a base color evenly all over your eyelid using a neutral or light shade. Then, using a medium or slightly darker shade, define the crease of your eyelid with a fluffy blending brush. Blend in small, windshield-wiper motions. Now it is time to add depth. Use a dark shade along the outer corner (the “V” shape) of your eyelid, blending it into the crease. Next, highlight the brow and inner corner.
Applying a light or shimmer shade under the brow and in the inner corner of your eyes will brighten and open up the eyes. Make sure to thoroughly blend all the shades together using a clean blending brush; this will help you avoid getting harsh lines and ensure a smooth transition between colors. A good starting point for eyeshadow would be The Urban Decay Naked Palette, which has great starter colors.
Step 10: Eyeliner
Applying eyeliner can be tricky in the beginning, but by using this simple method, you will soon get the hang of it. Make sure your eyeliner is thinner at the inner corner and thicker toward the outer edge of your top lash line. To create a single, consistent line on your top lash line, apply the liner in small strokes and fill out your marks as necessary. There are a variety of eyeliner types available; for a beginner, I would suggest using the L’Oreal Paris Infallible Grip Mechanical Gel Eyeliner Pencil for easy application.
Step 11: Mascara
Finish your eyes with mascara to lengthen and volumize. Firstly, curl your lashes in preparation for the mascara; then, starting at the base of your lashes, sweep the applicator upward, applying mascara to the whole length of the lashes from root to tip. Wait a few seconds and repeat the process to give more volume and length. Clean up any smudges with a cotton swab or makeup remover. A reliable option for a beginner is Maybelline Lash Sensational.
Step 12: Lipstick
Complete your look with lipstick. Firstly, prepare your lips by gently exfoliating and moisturizing; this creates a smooth base for the lipstick. You can then use a lipliner to outline your lips; this step is purely optional. Now begin to apply your lipstick; work outward from the center. Once the first layer is applied, blot the lips and apply a second layer for a more vibrant finish. I would suggest going for a nude shade for versatility. The Revlon Super Lustrous Lipstick line range offers a variety of choices.
For those who are new to wearing make-up and would prefer an easy, hassle-free experience, I would recommend this ALL-in-One Makeup Kit.
Congratulations! You now have a basic makeup routine to get you started that is both simple and effective. With these steps, you can easily create a polished look every day.
Disclosure: This post may contain sponsored links. www.lookladies receives a small commission if you decide to make a purchase through our link; this adds no extra cost to your purchase. This commission helps to fund the running and upkeep of this website. Many thanks for your support, the Look Ladies team.